 Save on Pinterest
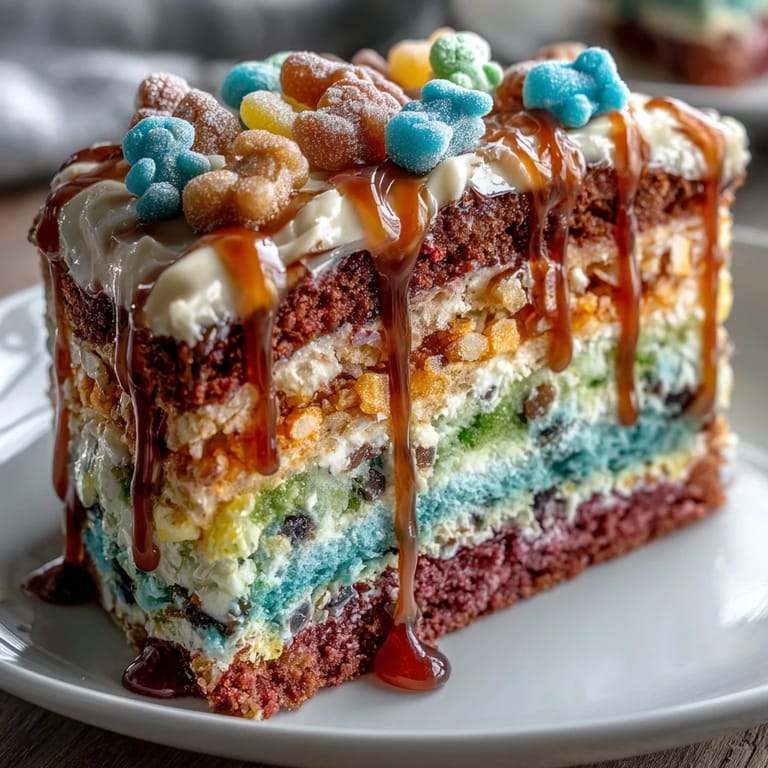
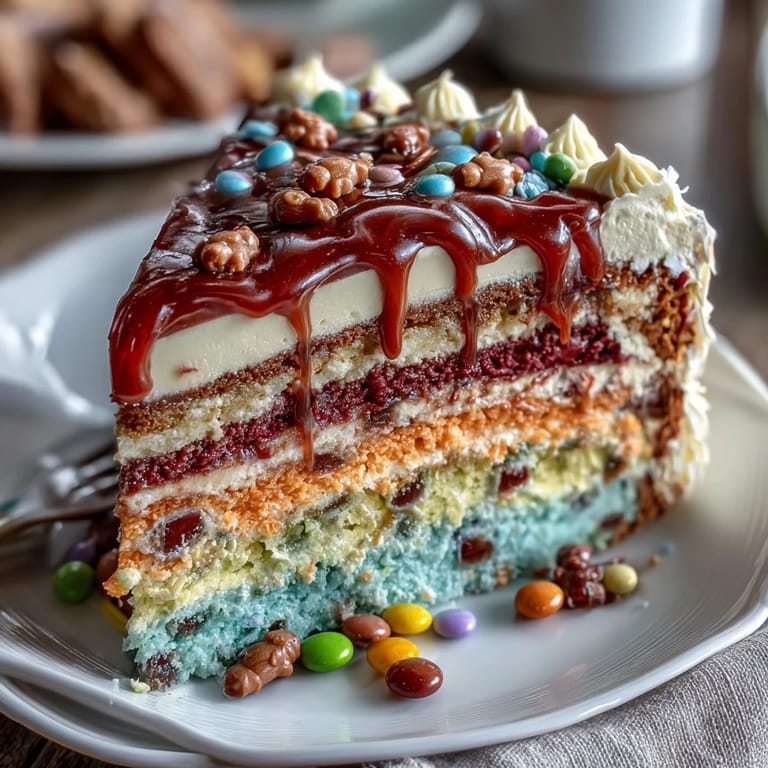
 The first time I made a piñata cake, my kitchen looked like a rainbow had exploded—there were bowls of colored batter everywhere, and my hands were stained every color imaginable. A friend had challenged me to make something that would actually surprise people at a Cinco de Mayo party, and the moment I realized I could hide candy inside layers of cake, I knew I'd found the answer. Watching guests slice into it and discover the cascade of colorful candies spilling out made all that mess completely worth it.
I remember my neighbor asking why my kitchen smelled like vanilla and looked like a craft project gone wrong when she stopped by during my testing phase. By the end of that afternoon, she was sitting at my counter with a fork, marveling at how the rainbow layers caught the light when you held a slice up to the window. That's when I realized this cake isn't just dessert—it's conversation, it's joy, it's edible celebration.
Ingredients
- All-purpose flour (3 cups): This is your cake's foundation, and measuring it by weight rather than scooping from the bag prevents the dense, heavy cake disasters that haunted my early attempts.
- Baking powder and baking soda (2½ tsp and ½ tsp): They work together to give you that light, tender crumb that holds up beautifully when you're stacking colored layers.
- Unsalted butter and granulated sugar (1 cup butter, 2 cups sugar): Creaming these together until fluffy is non-negotiable—this is where the cake gets its tender texture and ability to rise properly.
- Eggs and vanilla (4 eggs, 2 tsp vanilla): Room temperature eggs incorporate more smoothly and create a more cohesive batter than cold ones straight from the fridge.
- Whole milk (1¼ cups): The dairy adds richness and helps create that classic tender crumb texture that makes this cake worth celebrating.
- Gel food coloring (red, orange, yellow, green, blue, purple): Gel coloring gives you vibrant, true colors without watering down your batter the way liquid food coloring would.
- Assorted small candies (1½ cups): This is your piñata surprise, so choose candies you actually love—I learned this after my first attempt with stale office candy nobody wanted to find.
- Butter and powdered sugar for frosting (1½ cups butter, 5 cups powdered sugar): This buttercream is sturdy enough to hold up the layers while still being creamy and delicious, and sifting the powdered sugar prevents lumps that ruin the smoothness.
Tired of Takeout? 🥡
Get 10 meals you can make faster than delivery arrives. Seriously.
One email. No spam. Unsubscribe anytime.
Instructions
- Set your oven and prep your pans:
- Preheat to 350°F and grease three 8-inch round cake pans, then line the bottoms with parchment—this prevents any sticking disasters when you're unmolding those delicate colored layers.
- Whisk your dry ingredients together:
- In a medium bowl, combine flour, baking powder, baking soda, and salt, whisking them until they're evenly distributed and there are no lumps hiding in the flour.
- Cream butter and sugar into fluffy clouds:
- Beat them together for about three minutes until the mixture is pale, light, and almost doubled in volume—this is where your cake gets its tender structure. Add eggs one at a time, making sure each is fully incorporated before adding the next, then mix in vanilla.
- Alternate dry and wet ingredients with care:
- Add the flour mixture in three portions, alternating with the milk and starting and ending with dry ingredients—this keeps your batter from becoming tough or overmixed. Stir just until combined; overmixing develops gluten and makes the cake dense.
- Divide and color your batter:
- Divide the batter into six bowls and add a different gel color to each one, stirring gently until the color is even throughout. The batter should look like edible paint.
- Pour into pans and bake:
- Pour each colored batter into a prepared pan, smooth the tops, and bake for 15 to 18 minutes until a toothpick inserted in the center comes out clean. Let them cool in the pans for 10 minutes, then turn them out onto wire racks to cool completely.
- Cut the center holes with precision:
- Once the layers are completely cool, use a 3-inch round cutter to carefully cut a hole in the center of four of your six layers—leave the top and bottom layers whole so they act as your container for the candy surprise. Remove the cut-out circles and set them aside.
- Make your frosting:
- Beat softened butter until creamy, then gradually add sifted powdered sugar, milk, vanilla, and salt, beating until the frosting is smooth and fluffy. If you want colored frosting for decorating, divide it now and add gel coloring.
- Stack and fill with strategy:
- Place the purple layer (or whichever color you're saving for the bottom) whole on your serving plate and spread a thin layer of frosting. Stack the first cut-out layer on top and frost lightly, repeating with all cut-out layers, which creates a tall cavity in the middle of your cake.
- Fill the piñata cavity:
- Pour your assorted candies into the center hole, piling them high so the reveal will be generous and exciting.
- Cap it off:
- Place the final whole layer on top to seal in all those candies, creating the surprise element that makes this cake special.
- Frost the outside generously:
- Cover the entire outside of the cake with frosting, using an offset spatula to create smooth or textured surfaces as you prefer. Decorate with additional colored frosting, sprinkles, or festive decorations that match your celebration.
- Chill before slicing:
- Refrigerate for 30 minutes to let everything set and make clean slicing easier, which is important when you're trying to showcase those beautiful layers and candies inside.
 Save on Pinterest
 The magic moment came when my eight-year-old cousin pulled a slice onto her plate and gasped when she saw the rainbow layers and the candy tumbling out. She stopped mid-bite to show everyone at the table, and suddenly the whole room wanted a slice just to see what was inside their piece. That's when I understood that this cake isn't just about taste—it's about creating a moment of wonder.
Why Baking in Batches Works (If You Don't Have Six Pans)
Not everyone has access to six cake pans, and honestly, I didn't either when I first made this. I baked the colored layers in two batches using three pans, letting each batch cool before rotating in the next set of batter—it took longer but the results were identical. The key is keeping your oven temperature consistent and making sure each layer has time to cool completely before you start stacking, otherwise the frosting will melt and your whole structure becomes wobbly.
The Art of Choosing Your Piñata Candies
This is where you get to be creative, but there are some hard-learned rules I discovered the messy way. Avoid anything large, sticky, or with hard edges that could damage the cake layers when you're stacking them—small candies like M&Ms, gummy bears, and sprinkles work beautifully because they nestle together without creating gaps or pressure points. I once used some chunky caramels and they shifted during assembly, making the whole stack lean like the Tower of Pisa.
Storage and Make-Ahead Tips
You can bake the layers the day before and store them in an airtight container at room temperature, which actually takes some of the pressure off if you're hosting a party. The frosting can also be made a day ahead and refrigerated, though you'll want to let it come to room temperature and give it a quick stir before using it. The assembled cake keeps beautifully in the refrigerator for up to two days, and honestly, the flavors actually mellow and meld together, making it taste even better the next day.
- If you need to transport the cake, keep it in a sturdy container and place it on a flat surface—the refrigeration will keep everything stable for a short drive.
- For a gluten-free version, swap in a quality 1:1 gluten-free flour blend and the cake will bake with nearly identical results.
- Always check your candy packaging for allergens, especially if you're baking for a group with dietary restrictions or allergies.
 Save on Pinterest
 This cake is about joy in edible form, about taking the time to create something that makes people smile before they even taste it. Once you've seen someone's face light up when they discover that candy-filled center, you'll understand why this recipe is worth the extra effort.
Recipe Questions & Answers
- → How do I create the colorful layers?
Divide the batter evenly into separate bowls and tint each with gel food coloring—red, orange, yellow, green, blue, and purple—before baking.
- → What candies work best for the piñata filling?
Use small, non-sticky candies like mini chocolates, rainbow sprinkles, and gummy bears to ensure easy slicing and even distribution.
- → How can I make cutting easier?
Chill the assembled cake for about 30 minutes before slicing to help maintain clean, defined layers and prevent the filling from spilling.
- → Can this be made gluten-free?
Yes, substitute all-purpose flour with a 1:1 gluten-free flour blend to accommodate gluten sensitivities.
- → What tools are needed to prepare this cake?
You'll need round cake pans, mixing bowls, an electric mixer, gel food coloring, a 3-inch round cutter, an offset spatula, and a wire rack.
- → How long does the baking process take?
Each layer bakes for 15-18 minutes at 350°F (175°C), with a total baking time of around 30 minutes plus cooling periods.