Save on Pinterest
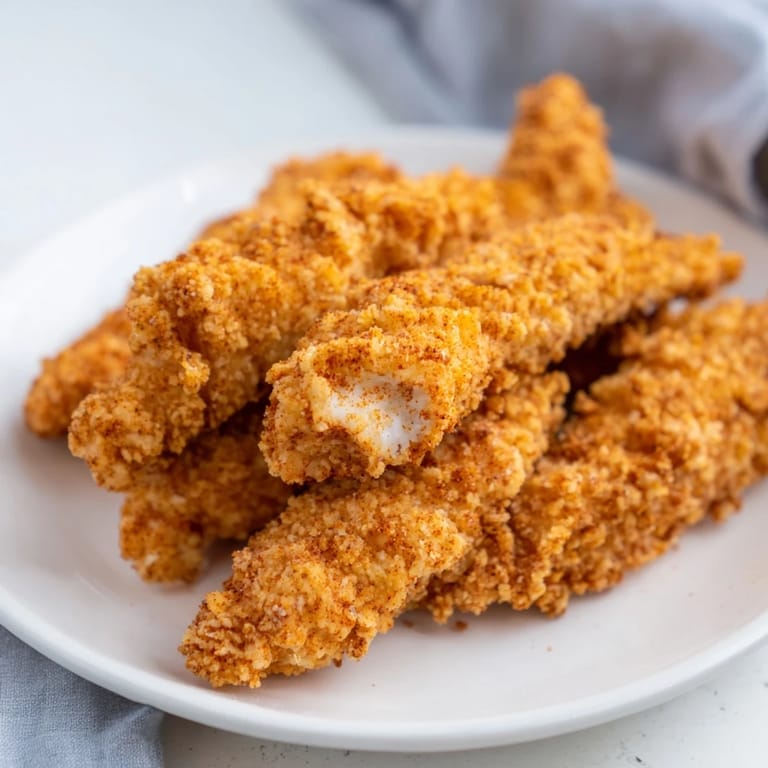
 My neighbor brought over a batch of buttermilk fried chicken tenders one summer evening, and I was instantly transported back to every county fair and backyard picnic I'd ever attended. The way they crackled when you bit into them, how the coating stayed golden even after cooling—I knew I had to figure out her technique. Turns out, the secret wasn't complicated at all, just buttermilk patience and a little respect for the hot oil.
I made these for my daughter's school fundraiser, and watching people come back for seconds told me everything I needed to know about this recipe. One dad mentioned it tasted exactly like what his mom used to make, and suddenly this simple dinner became a thread connecting kitchens across generations.
Ingredients
- Chicken tenders or breast strips (1.5 lbs): The best choice is tenders because they fry evenly, but fresh breasts cut into uniform strips work just as well and cost less.
- Buttermilk (1 cup): This is where the magic happens—the acidity breaks down the chicken fibers and keeps everything impossibly moist, so don't skip it or use a substitute.
- Salt, black pepper, garlic powder, onion powder, paprika (for marinade): These flavor the chicken from the inside out, creating depth that dry rubs can never match.
- Cayenne pepper (1/4 teaspoon, optional): Add this if you want heat that creeps up on you rather than punches immediately.
- All-purpose flour (1.5 cups): The base of your coating—nothing fancy needed here.
- Baking powder (1/2 teaspoon): This tiny amount creates little air pockets in the coating, making it exponentially crunchier than flour alone.
- Vegetable oil for frying: Neutral oil with a high smoke point is essential; peanut oil works beautifully if you have it.
Tired of Takeout? 🥡
Get 10 meals you can make faster than delivery arrives. Seriously.
One email. No spam. Unsubscribe anytime.
Instructions
- Build your marinade:
- Whisk together buttermilk with all the seasonings in a bowl large enough to hold the chicken comfortably. The mixture should smell immediately aromatic and inviting.
- Marinate with patience:
- Add chicken, making sure every piece is submerged and coated. Cover and refrigerate for at least 2 hours, though overnight gives you even more tender, deeply flavored chicken.
- Prepare your coating station:
- In a shallow dish, combine flour with salt, pepper, paprika, garlic powder, onion powder, and baking powder. Mix thoroughly so the seasonings distribute evenly—this is your crispy armor.
- Dredge with confidence:
- Remove chicken from buttermilk one piece at a time, letting excess drip back into the bowl. Press each tender firmly into the flour mixture so the coating clings for dear life. Lay coated pieces on a clean plate and let them sit for a few minutes while the flour sets.
- Heat your oil properly:
- Pour 2 inches of oil into your skillet or Dutch oven and heat to exactly 350°F. This temperature is the sweet spot—hot enough to crisp the outside before the inside dries out.
- Fry in batches:
- Working in groups of 3 or 4 so you don't crowd the pan, carefully add chicken to the hot oil. Fry for 3 to 4 minutes on each side until the coating turns deep golden brown and the internal temperature reaches 165°F.
- Drain and rest:
- Transfer cooked tenders to a wire rack or paper towels. They'll continue to crisp as they cool slightly, and you'll hear that satisfying crackle with every bite.
 Save on Pinterest
 My son, who usually pushes away anything fried, grabbed three of these straight from the cooling rack and ate them while still burning his fingers. That moment of seeing him genuinely enjoy something I made stuck with me more than any compliment ever could.
The Art of the Perfect Crust
The coating is everything—it's what separates a good fried chicken from a transcendent one. I learned that the baking powder is non-negotiable because it creates tiny bubbles during frying that make the crust shatter when you bite it. The double-dip trick works because that second buttermilk bath reactivates the flour's gluten, creating an even tighter, crunchier seal.
Marinating Mastery
Most people think buttermilk is just for pancakes, but it's actually a secret weapon for making protein tender. The acidity breaks down muscle fibers while the fat keeps everything moist, so even if you accidentally leave the chicken in overnight, it stays perfect. I've made this with the marinade anywhere from 2 hours to 18 hours, and honestly, the longer soak just means deeper flavor.
Serving and Storage
Hot from the oil is ideal, but these tenders stay crispy for several hours, making them perfect for meal prep or packed lunches. I've also reheated leftovers in a 350°F oven for 10 minutes and gotten back that shattering crunch.
- Serve alongside honey mustard, ranch, or whatever sauce makes you happiest—these tenders are confident enough to stand on their own or play well with others.
- Pair with coleslaw, cornbread, or pickles if you want to build a whole meal around them.
- Store leftovers in an airtight container in the fridge for up to 4 days, and they're actually perfect cold if you want an excellent chicken sandwich the next day.
 Save on Pinterest
 These tenders have become my go-to when I want something that tastes indulgent but doesn't stress me out. They're the kind of recipe that reminds you why simple, done right, beats complicated every time.
Recipe Questions & Answers
- → How long should chicken marinate in buttermilk?
Marinate the chicken tenders for a minimum of 2 hours, or up to overnight, to ensure maximum tenderness and flavor absorption.
- → What spices are used in the coating flour?
The coating combines paprika, garlic powder, onion powder, salt, black pepper, and baking powder for a flavorful, crispy crust.
- → What oil temperature is ideal for frying?
Heat the oil to 350°F (175°C) for perfectly fried, golden and crispy chicken with a juicy interior.
- → Can double coating improve the crunch?
Yes, dipping the chicken back into buttermilk before a second flour coating enhances the crunchiness significantly.
- → What dipping sauces pair well with buttermilk fried chicken?
Honey mustard, ranch, or a spicy hot sauce complement the crispy, flavorful chicken nicely.