 Save on Pinterest
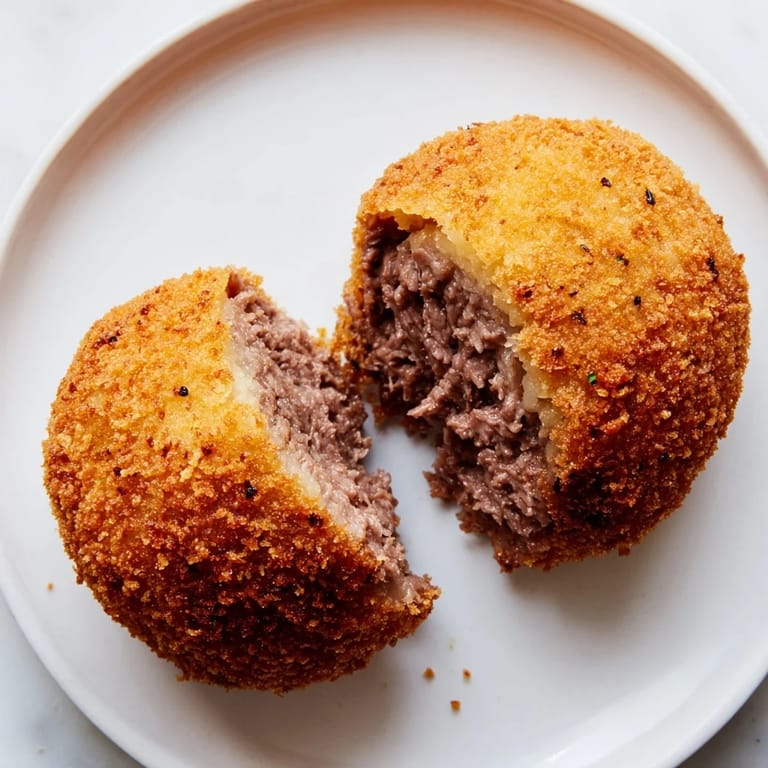
 My first Dutch croquette arrived at a small restaurant in Amsterdam on a gray afternoon, served alongside a small cup of mustard and a knowing smile from the server. I bit through the crackle of breadcrumbs into a pocket of creamy beef ragout so rich and unexpected that I had to sit with it for a moment, just tasting. Years later, when I finally made them at home, I realized the magic wasn't in some secret ingredient—it was in patience: the slow braise of beef until it surrendered, the gentle roux that held everything together, and the discipline to wait for a proper chill before breading. That first batch turned my kitchen into something like Amsterdam, with the smell of frying oil and butter hanging in the air.
I made these for a dinner party once, nervous about timing everything correctly, only to find myself standing at the stove while my friends gathered in the kitchen, mesmerized by the sizzle and the aroma. Someone offered to help with the breading, and soon we were laughing at our clumsy fingers, egg dripping everywhere, turning what could have been stressful into the best part of the evening. The croquettes came out golden, and everyone ate them with the kind of focus usually reserved for very good chocolate.
Ingredients
- Stewing beef (250 g): Chuck works beautifully here because it breaks down into tender, flavorful shreds after simmering; avoid lean cuts that turn tough.
- Beef broth (500 ml): Use homemade if you can—it deepens the ragout in ways that boxed broth never quite matches.
- Bay leaf: Essential for those subtle earthy notes that make people say 'what is that flavor?' without you having to tell them.
- Onion (1 small, finely chopped): Sweetness and depth, cooked until it's nearly transparent and loses its sharpness.
- Unsalted butter (1 tbsp + 40 g): Split across two stages; the first builds the base, the second creates the roux that binds everything into creamy luxury.
- All-purpose flour (40 g + 100 g): The smaller amount becomes a roux; the larger amount is your first breading layer and must be finely ground for adherence.
- Whole milk (150 ml): Adds richness without overwhelming; whole milk makes a visible difference in mouthfeel compared to lower-fat versions.
- Ground nutmeg (1/2 tsp): A whisper of warmth that rounds out the beef; start cautious because it's easy to overpower.
- Fresh parsley (1 tbsp, optional): A fresh brightness that lifts the heaviness if you're in the mood for it.
- Eggs (2 large): Your binding agent in the breading station; beat them just before using so they coat evenly.
- Panko or Dutch paneermeel (150 g): The difference between ordinary crispness and a proper shatter—panko creates bigger, airier pockets that fry to gold.
- Neutral oil: Sunflower or canola work well; avoid anything with a low smoke point because you'll be frying at 180°C.
Tired of Takeout? 🥡
Get 10 meals you can make faster than delivery arrives. Seriously.
One email. No spam. Unsubscribe anytime.
Instructions
- Braise the beef with intention:
- Combine beef, broth, bay leaf, and salt in a saucepan and bring to a boil, then lower the heat to a gentle simmer for about 1 hour. The beef should shred easily with a fork when done, no resistance. Reserve 200 ml of the cooking liquid—this becomes your ragout's soul.
- Build the beef base:
- Melt 1 tbsp butter in a skillet and cook the onion until it's soft and turning translucent, about 3 minutes. Stir in your shredded beef, taste as you season with pepper and additional salt.
- Make the roux and bind everything:
- In a clean saucepan, melt 40 g butter over low heat, then whisk in the flour, stirring constantly for 2 minutes to cook out any raw flour taste. Gradually pour in the reserved broth and milk, whisking to avoid lumps, until the mixture thickens into a silky sauce.
- Combine and season the ragout:
- Fold the beef mixture into the roux along with nutmeg and parsley if using. Stir until completely uniform, taste, and adjust seasoning—this is your last chance to dial in the flavor.
- Chill for structure:
- Spread the ragout into a shallow dish, cover, and refrigerate for at least 1 hour, preferably 2. This cooling firms everything enough to hold shape during breading and frying.
- Shape with cool hands:
- Form 10 cylinders about 8 cm long from the chilled filling. If the mixture gets too warm and soft, return it to the refrigerator for 15 minutes.
- Build your breading station:
- Arrange three shallow bowls with flour, beaten eggs, and breadcrumbs. Roll each croquette in flour, shaking off excess, dip fully in egg, then coat in breadcrumbs, pressing gently so they adhere. For extra crispiness, repeat the egg and breadcrumb coating.
- Fry until gold:
- Heat oil to 180°C (350°F) in a deep fryer or heavy pot. Fry croquettes in small batches for 3–4 minutes, turning occasionally, until the exterior is deep golden and you can hear the crackle. Don't overcrowd the pan or the oil temperature drops.
- Rest and serve:
- Drain fried croquettes on paper towels for a minute to shed excess oil. Serve hot with mustard for dipping.
 Save on Pinterest
 There's a moment when you pull the first batch from hot oil and set it on paper towels, still crackling slightly, and you know you've made something that tastes like care. These croquettes became my comfort food disguised as sophistication, proof that good food doesn't need to be complicated, just made with attention.
The Ragout Foundation
The ragout is where all the flavor lives, and it's built in layers that honor the slow cooking method that made Dutch cuisine what it is. Starting with beef braised low and long dissolves connective tissue into gelatin, creating natural body and richness that boxed filling can never touch. The onion adds sweetness, the nutmeg adds mystery, and the roux binds it all while adding a subtle savory depth. Once you understand that this filling is essentially a concentrated beef stew, you'll start trusting your instincts about seasoning and texture.
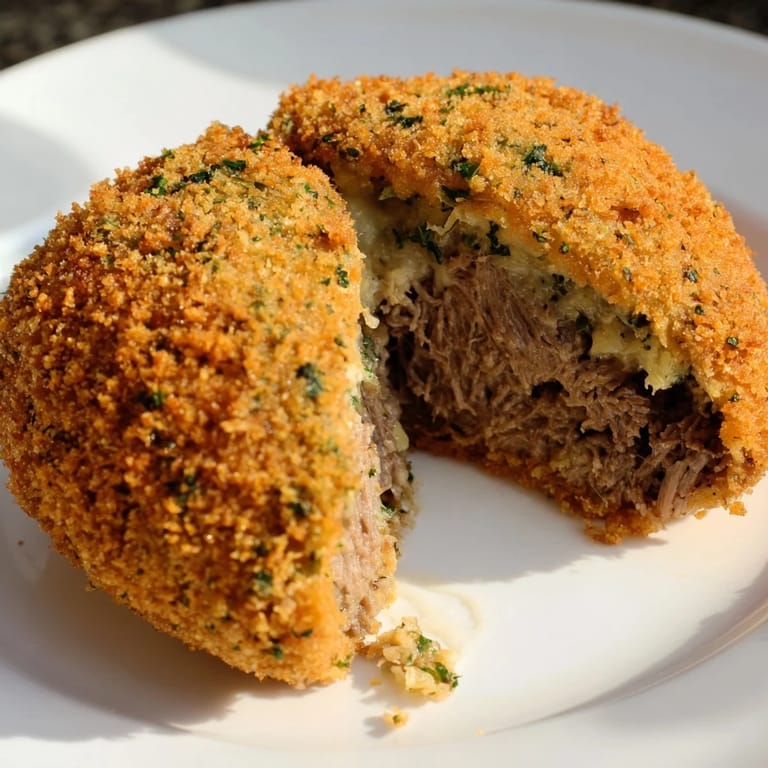
The Breading Ritual
The breading station is not just technique—it's a moment where your hands remember what they're doing, where you feel the texture change from soft to coated, where you start to understand why this dish matters. Each croquette moves from flour to egg to breadcrumbs in a practiced dance, and if you're making these with someone, it becomes conversation without needing to talk. The crumb layer is your promise to whoever eats these that you paid attention, that you didn't rush, that you cared about the final bite shattering between their teeth.
Making Ahead and Freezing
These croquettes are one of those rare dishes that actually benefit from time in the freezer, becoming even more stable and easier to fry once they're frozen solid. You can bread them hours in advance or days in advance, which means you can arrive at a party looking effortlessly prepared while knowing you've already done the hardest work. The frozen-to-fryer transition adds just 1–2 minutes to the cooking time and sometimes yields an even more delicate interior because the heat penetrates more slowly.
- Breaded croquettes keep in the freezer for up to 3 weeks if well-wrapped in parchment between layers.
- Fry directly from frozen without thawing to preserve the structural integrity and achieve the best contrast between crispy shell and creamy center.
- Pair with cold mustard, crisp pickles, or fries for the most authentic Dutch experience possible.
 Save on Pinterest
 These croquettes carry the warmth of a Dutch table, where good food and lingering conversation are the same thing. Make them once and they become part of your regular rotation, the dish you reach for when you want to feel capable and generous at the same time.
Recipe Questions & Answers
- → How do I ensure the filling is properly creamy?
Cook the roux slowly while whisking in reserved beef broth and milk until thickened, then combine with shredded beef mixture for a smooth, creamy texture.
- → What oil is best for frying croquettes?
Use a neutral oil with a high smoke point like sunflower or canola oil to ensure even frying and crispiness.
- → Can croquettes be prepared ahead of time?
Yes, shape and bread the croquettes, then freeze them. Fry directly from frozen, adding 1–2 extra minutes to the cooking time.
- → How to avoid croquettes falling apart during frying?
Chill the filling thoroughly before shaping and ensure each croquette is well coated with flour, egg, and breadcrumbs before frying.
- → What is a good accompaniment for these croquettes?
Serve hot with mustard for dipping, or alongside fries and a crisp pilsner or pale lager for a balanced meal.