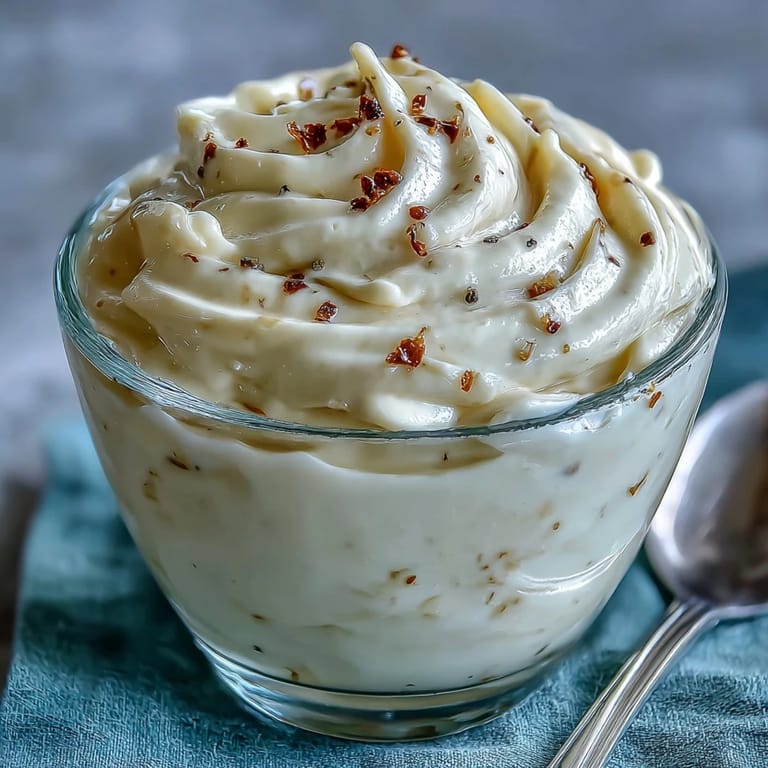
 Save on Pinterest
 Whirring up homemade mayonnaise with an immersion blender always makes me think of lazy Sunday mornings when I scramble to whip up breakfast sandwiches for friends. The first time I tried it, I was amazed at how quickly the mixture transformed—just seconds to creamy perfection, no fuss. The satisfying pop as you seal the jar signals the start of something so much tastier than what you’ll find at the store. Light, pillowy mayo turns even a simple snack into something worth savoring. I still get a little thrill every time I lift the blender and see the emulsion take shape.
One afternoon, while prepping a picnic basket for a last-minute park outing, I realized I'd forgotten to buy mayonnaise. I dashed into the kitchen, grabbed the immersion blender, and within minutes had a jar that felt like the secret star of our sandwiches. The sharp tang and rich creaminess outshone everything else. Everyone kept asking where I bought it. That impromptu batch became a running joke for future gatherings: “Bring your park mayo.”
Ingredients
- Large egg (room temperature): The backbone for emulsification; I learned that a cold egg won't blend as smoothly, so I always let mine sit out for a bit.
- Dijon mustard: Adds a sharp, savory note and extra emulsion stability—I once tried skipping it and the texture was noticeably less creamy.
- White wine vinegar or lemon juice: This acid brightens the mayo—if you want it zestier, lemon juice delivers a lighter touch.
- Neutral oil (sunflower, canola, or light olive oil): The oil shapes the flavor; stick to a light oil unless you're after assertive olive undertones.
- Fine sea salt: Ties everything together; I found using sea salt keeps the flavors clean.
- Freshly ground black pepper (optional): Sprinkle for depth; sometimes I skip it for a smoother canvas.
Tired of Takeout? 🥡
Get 10 meals you can make faster than delivery arrives. Seriously.
One email. No spam. Unsubscribe anytime.
Instructions
- Set Up Your Ingredients:
- Gather your egg, mustard, vinegar or lemon juice, salt, and pepper into a tall, narrow blending cup—it's key for proper blending.
- Add the Oil:
- Pour your chosen oil right on top; you'll see it float until emulsified.
- Blend from the Bottom:
- Lower the immersion blender gently until it touches the cup's bottom, then start blending and enjoy the subtle hum beneath your hand.
- Watch for Emulsifying Magic:
- Hold steady for about 10 seconds—you'll see a sudden creamy transformation, like a little culinary magic.
- Move and Incorporate:
- Slowly raise and lower the blender to draw in all the oil, blending until thick and smooth to your liking.
- Season and Taste:
- Scoop a bit onto a spoon and check if it's perfect; adjust salt, pepper, or acidity as you see fit.
- Transfer and Store:
- Scrape mayo into a clean jar, twist the lid tight, and pop it in the fridge. Use within a week for best flavor.
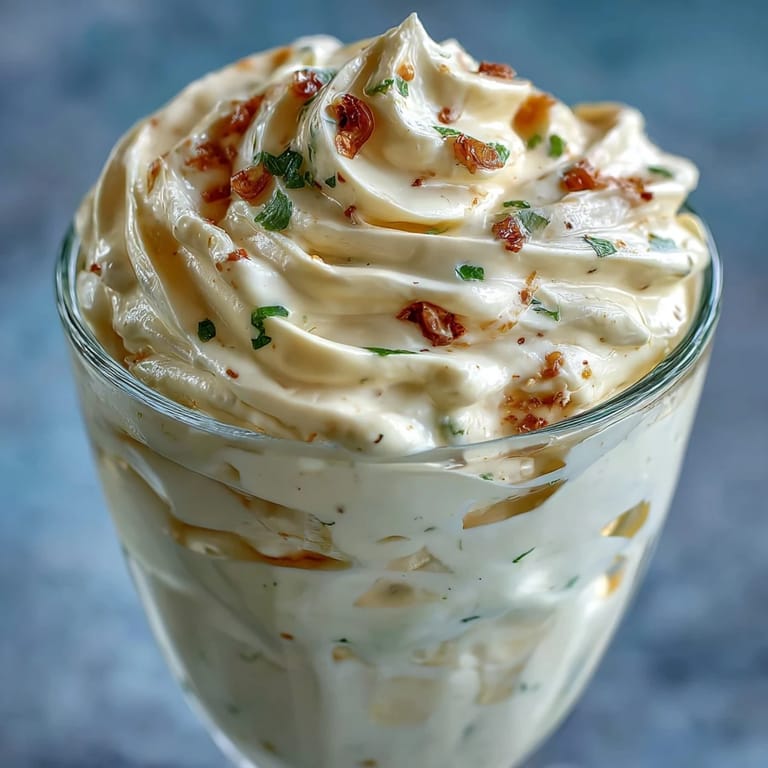 Save on Pinterest
 That time I brought a homemade jar of mayonnaise to a family barbecue, I watched as relatives dipped veggies and spread it on burgers, surprised by how bright and rich it tasted. It quickly became the must-have condiment at every summer get-together, a secret little point of pride for me. Seeing homemade mayo bring people together always leaves me grinning behind the grill. It's the sort of recipe that turns an ordinary meal into a little event. I still keep a jar handy for spontaneous snack attacks.
Secrets to Creamy Texture Every Time
Calm patience at the blending stage makes all the difference. If I rush and lift the blender too quickly, the mayo turns runny and never quite thickens again. I always recommend starting the blender right at the bottom and waiting for those first ribbons of creamy emulsion—then gently moving it up to incorporate the oil. You'll spot thickening as soon as the mixture pulls together, like glossy ripples forming. Once you learn the trick, you won't forget it.
How to Flavor Your Mayonnaise
I love playing with zesty add-ins once the basic mayo is blended. Sometimes I toss in roasted garlic or fresh herbs for an extra pop. One time, stirring in sriracha gave my potato salad an unexpected, addictive heat, and guests begged for the recipe. Lemon zest or smoked paprika are quick ways to make your mayo feel special. Flavoring at the end lets you adjust to your taste and ensures you don't overpower the creamy base.
Freshness & Storage Tips
After experimenting with different jars, I realized airtight glass works best to keep the mayo fresh and free from fridge odors. Since homemade mayo doesn't have preservatives, it's best to use it quickly and avoid letting it sit out. Never double-dip a spoon; that can shorten its shelf life. I label jars with the date just so there's no guessing.
- Keep the mayonnaise at fridge temperature to preserve its texture.
- Stir gently if separation occurs; it usually comes right back together.
- When in doubt, discard after a week for safety.
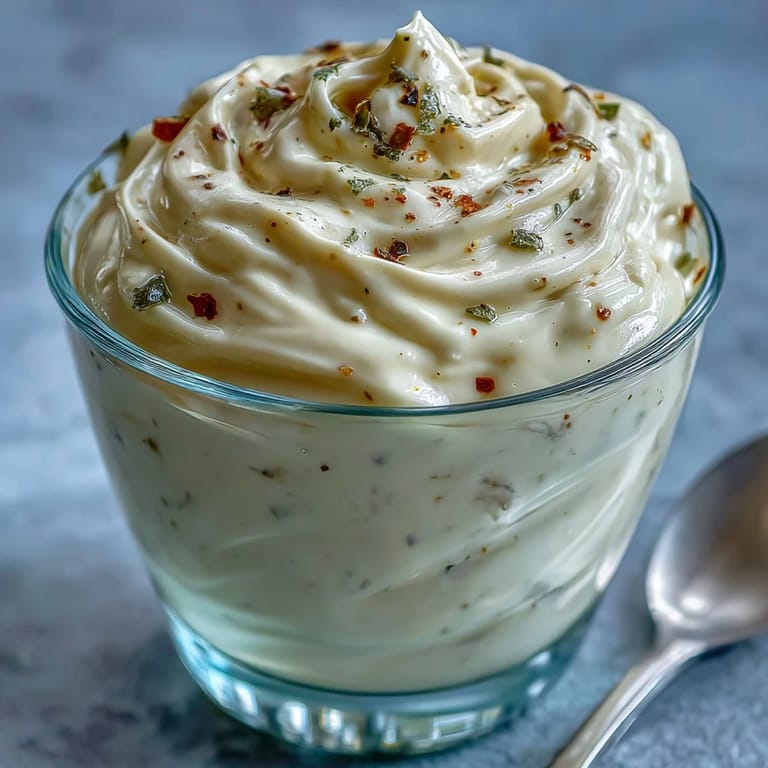 Save on Pinterest
 Homemade mayonnaise always feels like a tiny triumph in the kitchen. Just a handful of everyday ingredients, and suddenly sandwiches and snacks taste extraordinary.
Recipe Questions & Answers
- → How do I achieve a thick, creamy texture?
Use a tall container and blend from the bottom up with the immersion blender to emulsify ingredients properly.
- → Can I substitute the oil type?
Yes, neutral oils like sunflower, canola, or light olive oil work well. Stronger oils may affect flavor.
- → How long does homemade mayonnaise last?
Store in a sealed jar and refrigerate. Use within one week for best freshness and safety.
- → What can I add for extra flavor?
Add more vinegar or lemon juice for tang, or blend in garlic for a garlicky aioli variation.
- → Is this suitable for vegetarian and gluten-free diets?
Yes, it fits both diets. Always check labels on oil and vinegar for any allergens or cross-contamination.
- → Can I use pasteurized eggs?
Yes, using pasteurized eggs is a safe option, especially if you’re concerned about consuming raw eggs.